How to build a DIY plant stand with style is a fun and creative way to add charm to your indoor space. Whether you’re working with a cozy apartment or a spacious living room, the right plant stand can elevate your greenery and your décor. It’s all about blending function with personality.
Incorporating stylish plant stands into your home doesn’t require a designer budget or advanced skills. With a few simple materials and some inspiration, you can craft something unique and beautiful. This is where DIY truly shines—customization and creativity at your fingertips.
A well-designed plant stand does more than just hold your plants—it helps define your interior aesthetic. From minimalist wood designs to bold, colorful statement pieces, there’s a style for every taste. The possibilities are as endless as the types of plants you love.
Ready to give your indoor garden a makeover? In this guide, we’ll walk you through easy tips and ideas to help you design a plant stand that’s both practical and chic. Let’s get started on your stylish green corner.
Key takeaways
- Choose materials that fit your style and are sturdy enough for your plants.
- Incorporate different heights and tiers to make your plant display more dynamic.
- Follow a clear step-by-step guide to ensure your plant stand is stable and stylish.
Choosing the right materials for your plant stand
Choosing the right materials is key to building a plant stand that’s both stylish and sturdy. I’ve messed around with a few different options over the years, and let me tell you, it makes a difference!
You want something that looks good with your plants and your space, but also something that can handle the weight and won’t fall apart after a few months. Let’s dive into some of the best choices.
Wood options for a stylish finish
Wood is a classic choice for a reason. It’s versatile, relatively easy to work with, and can bring a warm, natural feel to your indoor garden. The type of wood you choose will really impact the overall look. Here are a few popular options:
- Pine: A budget-friendly option that’s easy to find at any hardware store. It’s soft, so it’s easy to cut and assemble, but it might need a little extra protection from moisture. Plus, it can be painted or stained any color you like.
- Cedar: Naturally rot-resistant, which makes it great if you tend to overwater your plants (guilty!). It has a beautiful reddish hue and a distinct smell that I personally love.
- Oak: A hardwood that’s super durable and has a beautiful grain pattern. It’s a bit more expensive and harder to work with than pine, but it’ll last a long time and add a touch of elegance.
Metal and other materials for durability
If you’re looking for something a bit more modern or industrial, metal is a great way to go. It’s strong, durable, and can handle a lot of weight. Plus, there are some other cool materials you might not have thought about!
- Steel: A super strong and durable option that can be powder-coated in any color. It’s perfect for a minimalist or industrial look. Just be careful when cutting and welding it – safety first, y’all!
- Copper: Adds a touch of warmth and sophistication. It’s also naturally antimicrobial, which is a bonus for your plants. Copper pipes and fittings can be used to create a unique and eye-catching plant stand.
- Concrete: For a really modern and industrial vibe, concrete is awesome. You can cast your own concrete planters and stands, or even just use concrete blocks for a super simple and sturdy base. It’s heavy, though, so keep that in mind when you’re moving it around.
Design ideas to elevate your indoor garden
Alright, so you’ve got your materials sorted, now let’s talk about making your plant stand look amazing. This is where you can really let your personality shine through. I’ve seen some pretty cool setups, and trust me, a little creativity goes a long way.
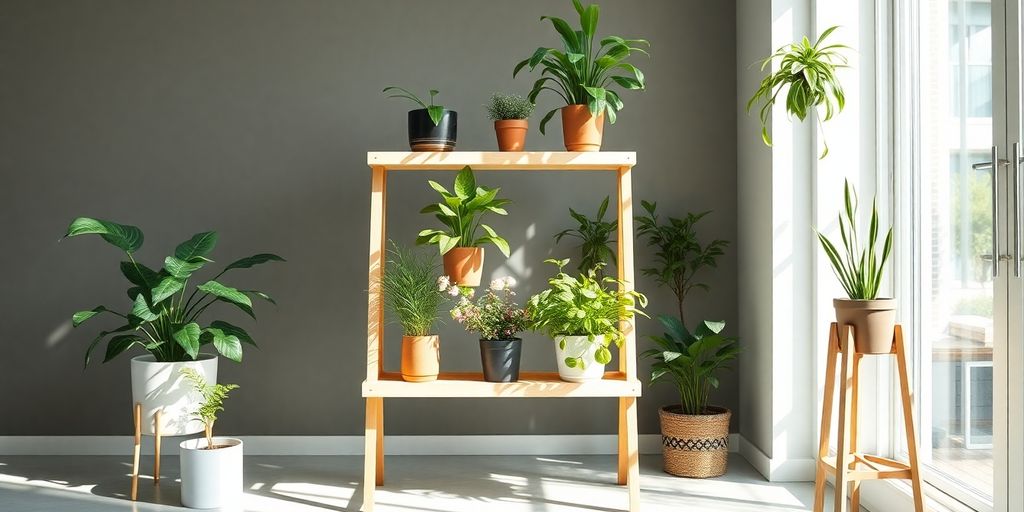
Incorporating height and tiers
Adding different heights is key to a visually appealing display. Think about it – if all your plants are on the same level, it’s kinda boring, right? I like to use tiered stands to create a little plant “staircase.” You can use a multi-shelf unit or even just stack some crates.
I even saw someone use an old shoe rack once, and it looked surprisingly good! This not only looks better but also lets you see all your plants, even the ones in the back. Plus, taller stands are great for trailing plants like fuchsias, letting them really show off their stuff.
Mixing styles for a unique look
Don’t be afraid to mix things up! I’m talking different materials, colors, and even plant pot styles. A copper and wood plant stand? Yes, please! It brings variety and makes your space way more interesting. You could even repurpose old furniture to give it a vintage glam or modern chic feel.
The goal is to create something that reflects your style. I’ve found that the more unique, the better. It’s like, why have a boring plant stand when you can have a conversation starter?
Step-by-step guide to building your plant stand
Essential tools and supplies
Alright, so you’re ready to get your hands dirty and build that plant stand! First things first, let’s gather the troops – I mean, the tools and supplies. Trust me, having everything prepped will save you a ton of headaches later on. I’ve learned that the hard way, more than once, let me tell you.
Here’s a list to get you started:
- Wood: Choose your wood based on the design and finish you’re aiming for. Pine is budget-friendly, but hardwoods like oak or maple will give you a more premium look. Don’t forget to measure twice, cut once!
- Cutting Tools: A saw is a must. A circular saw is great for straight cuts, but a jigsaw can handle curves if you’re feeling fancy. I personally love using my miter saw for clean, angled cuts.
- Fasteners: Screws are your best friend for a sturdy build. Make sure you have the right size for the thickness of your wood. Wood glue is also a great addition for extra strength.
- Measuring Tools: A tape measure, a level, and a square are crucial for accurate measurements and ensuring your plant stand isn’t wonky. I can’t stress this enough – a level stand is a happy stand!
- Finishing Supplies: Sandpaper, wood stain or paint, and a sealant will give your plant stand that professional touch. Don’t skimp on the sanding – it makes a huge difference in the final look.
- Safety Gear: Safety glasses and gloves are a must. Sawdust in the eye is no fun, and splinters are even worse. Trust me on this one.
Assembly tips for a sturdy build
Okay, you’ve got your tools and supplies, now let’s put this thing together! Here are some tips I’ve picked up over the years to ensure your plant stand is not only stylish but also rock-solid.
- Pre-Drill Holes: This is a game-changer, folks. Pre-drilling prevents the wood from splitting when you drive in screws, especially with hardwoods. It’s a small step that makes a big difference.
- Use Wood Glue: Apply wood glue to all joints before screwing them together. This adds a ton of strength and stability. Just be sure to wipe away any excess glue before it dries.
- Check for Square: As you assemble each section, use a square to ensure everything is at a 90-degree angle. This is crucial for a stable and balanced plant stand. A crooked stand will drive you nuts, trust me.
- Sand as You Go: Sanding each piece before assembly makes it easier to reach tight spots. Plus, it prevents you from accidentally sanding assembled parts unevenly.
- Apply Even Pressure: When screwing pieces together, apply even pressure to avoid warping or misalignment. A clamp can be super helpful here.
- Seal it Up: Once assembled, apply a sealant to protect the wood from moisture and wear. This is especially important if you plan to use the plant stand outdoors. I like to use a clear coat to let the natural wood grain shine through.
Remember, patience is key! Don’t rush the process, and take your time to ensure each step is done correctly. With a little effort, you’ll have a beautiful and sturdy plant stand that will elevate your indoor garden. Happy building!
Final thoughts on your DIY plant stand journey
So, there you have it! Building your own plant stand can be a fun and rewarding project. You don’t need to be a pro to create something stylish and functional. Just pick a design that speaks to you, gather your materials, and get started.
Remember, it’s all about showcasing your plants in a way that fits your space and style. Whether you go for a rustic wooden stand or a sleek metal design, your plants will thank you for the upgrade. Plus, you’ll feel great knowing you made it yourself. So, roll up your sleeves and let your creativity shine!
Frequently asked questions
What materials do I need to build a plant stand?
You can use wood, metal, or even repurpose old furniture. Just make sure whatever you choose can hold the weight of your plants.
How can I make my plant stand look stylish?
Try mixing different materials like wood and metal, or create tiers for height. Adding paint or decorative finishes can also help.
Is it hard to build a plant stand myself?
Not at all! With some basic tools and materials, you can follow simple steps to create a beautiful plant stand. Just take your time!